Setting up the Ethernet using the front panel
-
From the Home screen, press
 . The System Setup screen appears.
 -
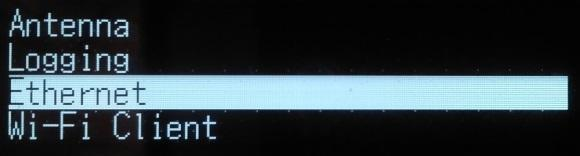
Press the down arrow key until Ethernet is highlighted:
-
Press
. -
At DHCP, press
. The DHCP setting is selected. If required, disable/enable DHCP: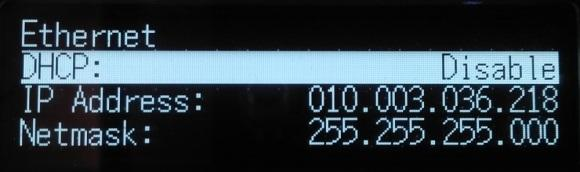
-
If DHCP is disabled, using the arrow keys move to the IP Address field. Press
. Enter your IP address (for example, 10.3.36.218). -
Using the arrow keys, move down to the Netmask field. Press
. Enter the required netmask. -
Using the arrow keys, move down to the Gateway field. Press
: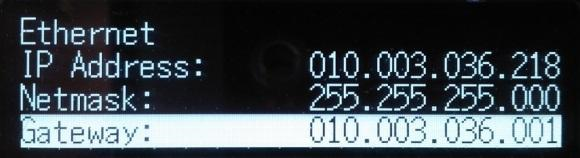
-
Enter the required gateway address. When finished, press
once, then press Esc to return to the System Setup screen. -
Restart the receiver for the changes to take effect.
-
Open a web browser on a computer connected to the LAN. In the address bar, enter your IP address (for example, 10.3.36.218). The web interface appears.